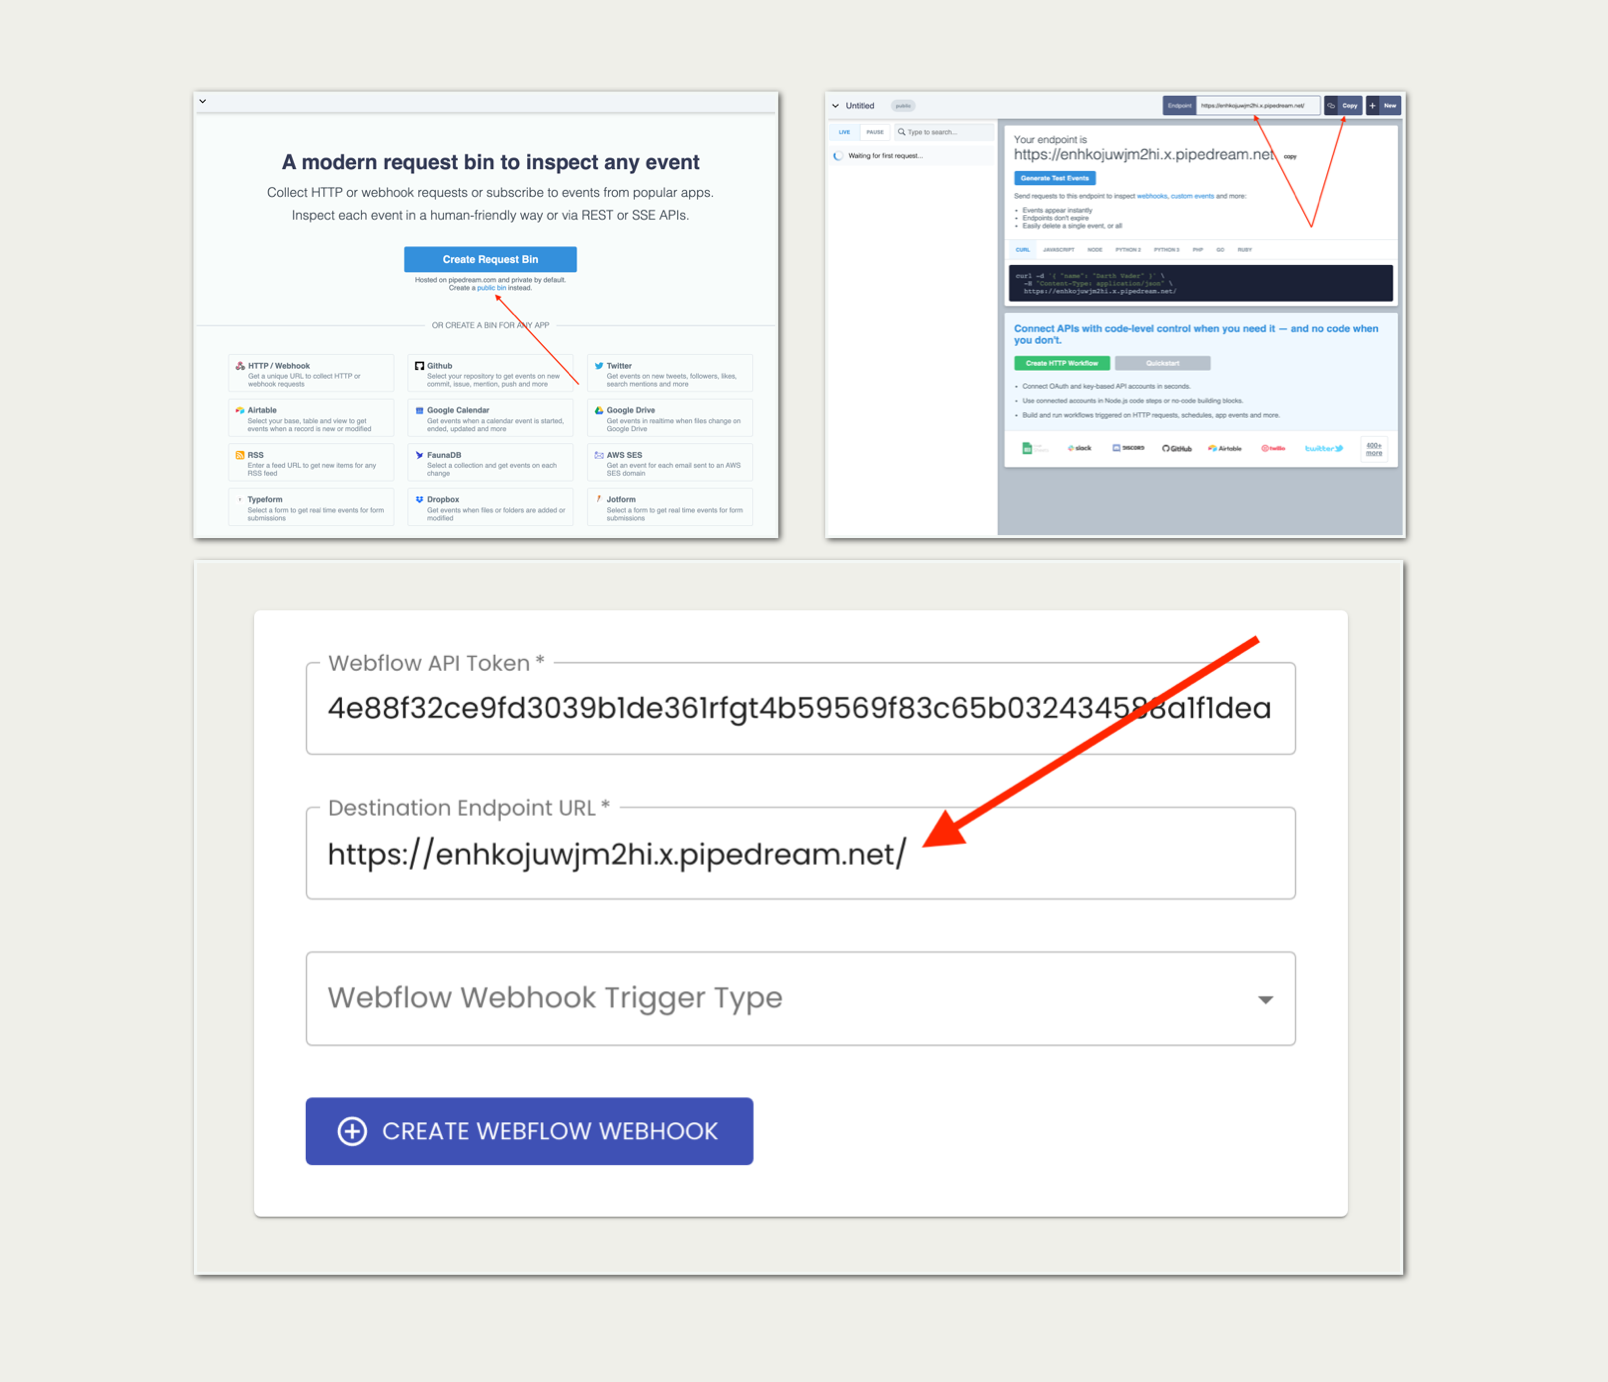
Add a "test" destination url
This is step 3 of creating Webhooks with Webflow. Follow the step-by-step instructions below and then continue to step 3.
- Open the free tool RequestBin.com.
- Find the small "public bin" link and tap that.
- Now you've just created a new "Destination URL" to test your Webhook with. Normally, this is where you'd add a Zapier, Make, or Integromat Webhook URL.
- Tap the "Copy" button (top right).
- Paste that into the WebhookCreator "Destination URL" field.
- Continue the set up with step 3: Create your Webhook
🤩 Email Course
My free 5-day email course gives you the missing deep dive showing you how to:
- ✅Always be successful when using my simple approach to Webhooks.
- ✅Discover "hidden" Webflow Webhooks - and use them as your secret advantage.
- ✅Setup Webflow Webhooks ( the easy way ), and save your expensive Zapier, Make & Integromat tasks.
- ✅Save time, and pain, by learning these concepts only once - but reuse what you've learned forever.
- ✅Step-by-step walk through using Webhooks to "Gate Access to Webflow with Stripe Payments" 🤯
* Includes the NoCodeQuest weekly newsletter, unsubscribe anytime.
